Running WebDriver Tests Using Maven in Eclipse
IDE
Maven is a well-known tool for building large
Java applications. In this tutorial, we’ll discover what Maven is and what
advantages it has over other build tools like ANT? Finally, we’ll expose a
detailed process of building WebDriver project in Maven. Eclipse is one of the most widely used IDE in the Java world. It provides support for various plug-ins like Maven to ease up the build management tasks for Java projects.
Before we
get through the procedure for running Webdriver tests using Maven,
let’s begin by understanding the Maven.
What is a Build Tool?
A build tool is a tool that automates everything related to
building the software project. Building a software project typically includes
one or more of these activities:
- Generating
source code (if auto-generated code is used in the project).
- Generating
documentation from the source code.
- Compiling
source code.
- Packaging
compiled code into JAR files or ZIP files.
- Installing
the packaged code on a server, in a repository or somewhere else.
Any given software project may have more activities than
these needed to build the finished software. Such activities can normally be
plugged into a build tool, so these activities can be automated too.
The advantage of automating the build process is that you
minimize the risk of humans making errors while building the software manually.
Additionally, an automated build tool is typically faster than a human
performing the same steps manually.
1- What is Maven?
Maven is a powerful project/build management tool that is
based on POM (project object model).
What it does?
1- It provides support for managing the entire lifecycle of a Java project.
2- Defining the project structure, dependencies, build, and test management are some of its magical traits.
3- Maven as a build tool allows setting up the execution environment for the project code to run independently.
4- It enables a unified platform where you can check out the source code from GIT/SVN, compile and package it into a JAR/WAR file.
5- You want a project management tool, Maven will do it for you. It has the project object model (POM) file to manage project’s build, dependency, and documentation.
6- Manage all project related dependencies using the POM.xml. It helps setting up all the configurations.
7- Ability to download the project dependency jars automatically from the central repository.
2- Why to use Maven in Selenium Project?
1- Since Maven is a build automation tool, so it can manage the Selenium Webdriver test project’s build compilation and documentation. It eases up the task of creating right project structure, adding and managing jar files in the projects build path.
2- Most important feature of Maven is managing the project dependencies using the POM.xml. Let’s take a simple example of upgrading a single jar file. Say, we were using Selenium version 2.53.1 which we later updated to a newer version. Such type of scenario is easy to handle using Maven as it requires updating the version in the POM file.
3- Now imagine the situation, when we have a large number of jar files with updates available. And if we have to update them manually, then it’ll turn out to be a cumbersome task. Also, there is a high probability of errors even if we’ve them updated manually.
4- Maven comes to the rescue in a situation like above. All we have to do is change the version of target jar files in the POM file. Maven will download the newer versions of all jar files automatically and store them in a local repository.
3- How does Maven handle the updates of a
dependency?
1- Whenever you update a dependency version in the POM file, Maven first verifies the version of the jar file from the local repository.
2- If the version is available locally, then no action will take place. Else it’ll download the upgrade from the central repository.
3- If the Jars are not available in the central repository, then Maven will look for them in the remote repository.
4- We can configure the remote repository in the <POM.xml> to enable the automatic downloads of dependencies.
4- Maven Repositories: Local, Server and Central
A maven repository is a
directory of packaged JAR file with pom.xml file. Maven searches for
dependencies in the repositories. There are 3 types of maven repository:
- Local Repository
- Central Repository
- Remote Repository
Maven searches for the dependencies in
the following order:

If dependency is not found in these
repositories, maven stops processing and throws an error.
Local Repository
Local repository is the local directory on the developer’s
computer. Generally, when you run maven command for the first time it downloads
all dependent JARS from Central/Remote repositories and store in the default
location
The default
location is
C:\Users\<user-name>\.m2\repository
Central Repository
Central maven repository is located on the web at http://repo1.maven.org/maven2/ and it is provided by Maven community
Note: First
time, maven tries to download most of the JARS from this central repository
Remote Repository
This repository as the name suggests resides in the remote
server and which can be accessed by using different file transfer protocols
like file:// or http://. Remote repository will be used for both downloading
and uploading the dependencies and artifacts.
5. How To Download And Install Maven In Eclipse?
Prerequisites:
Java should be installed and
JAVA_HOME Environment variable should be set.
Eclipse should be configured in your
system.
Step 1:
Open eclipse
IDE and go to Help -> Install New Software menu as shown in bellow
Image. It will open new software Installation window.
Step 2: Add bellow given URL in Work with text field of eclipse and
press keyboard ENTER button. It will search for maven software to install.
URL = http://download.eclipse.org/technology/m2e/releases
URL = http://download.eclipse.org/technology/m2e/releases
Step 3: On search completion, It will show
"Maven Integration For Eclipse" check box as shown In bellow
Image.
Select that
check box and click on Next button as shown In above Image. It will
start processing as bellow. It can take 1 to 2 minutes.
Step 4: When above process completed,
Install Remediation page will display as bellow. Click on Next On that
screen.
Step 5: Next screen will be Install Detail.
Click on Next on It.
Step 6: Next screen will be Review
licenses. Select "I accept the terms of the licenses agreement."
radio button and click on Finish.
It will
start installing maven in eclipse as bellow and it can take 5 to 20 minutes to
complete Installation. You can run It In background too.
Step 7: At the end of maven Installation,
It will show you message to restart eclipse. Click on Yes button as shown
below. It will restart your eclipse.
How to
confirm Maven Is Installed In your eclipse
To confirm that maven Is Installed properly or not In your eclipse, You need to open eclipse preferences window from menu Item -> Window -> preferences as bellow. It will show you Maven In tree as bellow on preferences window. It means maven Is Installed.
To confirm that maven Is Installed properly or not In your eclipse, You need to open eclipse preferences window from menu Item -> Window -> preferences as bellow. It will show you Maven In tree as bellow on preferences window. It means maven Is Installed.

You are done
with maven Installation.
Setup a Maven Project in Eclipse.
Steps to create new
maven project:
Step 1: First of all, Open eclipse IDE and
go for creating new project from New -> Project as shown in bellow
Image.
.

It will open
new project creation window.
Step 2: Expand Maven folder in new project
creation wizard window and select Maven Project and then click on Next
button as shown in bellow Image.

It will take you to
project name and location selection screen.
Step 3: On project name and location selection screen, you can
choose work space location for maven project by clicking on browse button. If
wants to use default work space location then select that check box and click
on Next button as bellow.

It will take you to
Archetype selection screen.
Steps 4: On Archetype selection screen, Select
Maven-archetype-quickstart option as bellow and click on Next button.

Step-5:
Enter Group Id and Artifact Id and Click on finish.

§ groupId uniquely
identifies your project across all projects, so we need to enforce a naming
schema. A groupId must follow Java's package name rules. This means it must
start with a reversed domain name you control. You can create as many subgroups
as you want.
eg. org.apache.maven, org.apache.commons
A good way
to determine the granularity of the groupId is to use the project structure. That
is, if the current project is a multiple module project, it should append a new
identifier to the parent's groupId. For example,
org.apache.maven, org.apache.maven.plugins, org.apache.maven.reporting
§ artifactId is
the name of the jar without version. If you created it, then you can choose
whatever name you want with lowercase letters and no strange symbols. If it's a
third party jar, you have to take the name of the jar as it's distributed.
eg. maven, commons-math
§ version if
you distribute it, then you can choose any typical version with numbers and
dots (1.0, 1.1, 1.0.1, ...). Don't use dates as they are usually associated
with SNAPSHOT (nightly) builds. If it's a third party artifact, you have to use
their version number whatever it is, and as strange as it can look. For
example,
2.0, 2.0.1, 1.3.1
Step-6:
Your project structure looks as below.

Step-7: Open pom.xml, and click on the
select the pom.xml tab on the right, you find the source code of the xml file.

Step-8: We can add more dependencies on this
file which is required for your project
For Example:
Navigate to selenium site
"https://docs.seleniumhq.org/download/maven.jsp", copy the dependency
lines from the selenium site.

9. Paste the
dependency on the pom.xml, inside the dependencies tag, if dependences tag is
not there, add one.

Note: junit
dependency has been added by default. I replaced it with testng dependency.

10. Similar
way you can add other dependencies according to your requirements.
11.
Press Ctrl+S, maven will download all the mentioned jar files and will
integrate to your project.
12. Create a
sample test class (MavenTest.java) under 'src/test/java' package.
13. Create
package 'testcases' under src/test/java package, and then
create a sample test class (MavenTest.java)
14. Write
following code in that class, if you get no error then we have installed the
maven successfully.
package testcases;
import
org.openqa.selenium.WebDriver;
import
org.openqa.selenium.firefox.FirefoxDriver;
import
org.testng.annotations.Test;
public class MavenTest {
@Test
public void test(){
WebDriver driver = new
FirefoxDriver();
driver.get("https://chercher.tech");
System.out.println("Title
of the page is : " +driver.getTitle());
}
}
15. Before
running we have to make sure of the compiler, navigate to Window>Preferences>Java>Installed
JREs

16. If you
have only jre as your Installed JRE, then we have to add our JDK. We will be
using the jre present under JDK. Click Add button > Standard VM >
Directory, set the JDK folder. Click finish.

17. Set the
jdk as default jre, and Click OK.

18. Right
click on the pom.xml > Run As >Maven:test

19. If the
configuration is correct, then maven downloads all the dependency jars and
starts executing the program.

20. You see
the result on the console of the Eclipse and on TestNG result tab.

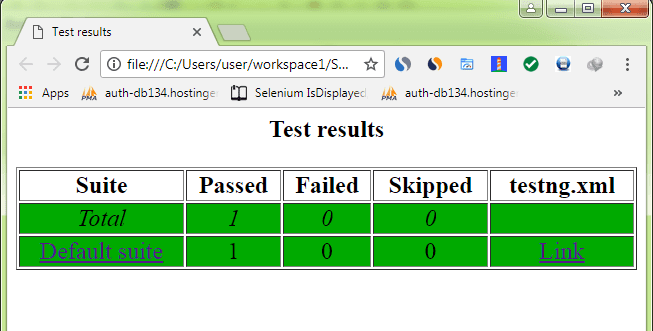
21. Go to
the folder's path in explorer, you can find test-output folder, open
the index.html file under test-output folder.
No comments:
Post a Comment